It would be
wise to have all the photos in a single folder before you start uploading them.
So put all the images you wish to upload in only one folder if they are
scattered around. Create a folder if needed at a location you can easily
remember.
Then log on
to your Facebook account and navigate to your profile. You can go to this page
by clicking “Profile” to the right hand top corner of your screen.
When the
profile page loads, you should see “Photos”. It is one of the many tabs that
appear below the name of your profile.
When the
next page downloads, pick the desired album. It will be the album where you
would like to include the photos. Clicking the album will load a page from where
you can view the current photos in that album.
This is the
step for which you have come so long. Now it is time to add more photos. Click
“Add More Photos”. It is a tab to the top left of your page.
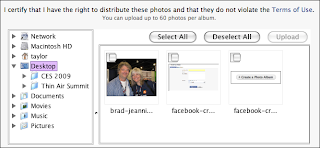
Now, open
the drive and the folder which you have created some time back. It is the same
folder where you have saved all your photos. Clicking the folder will display
all the images in it. It has a selection box so that you can select only those
images you want.
 You can
select each image individually. However, if you have made this folder to upload
all the images, click “Select All” to select all the photos in one go. Next,
click on “Upload”. It will start uploading the images one by one and will also
show you the progress of the upload through a pop-up box.
Once done
successfully, one more pop-up box should appear giving you the confirmation of
the successful upload. Click “Ok” and it will load another page. Here you apply
the captions and the tags of your friends. Bingo, you have uploaded photos to
your album successfully. Congrats!
You can even
work with the Simpler Uploader as well. Click “Try The Simple Uploader”. Click
the link and you will find loads of “Choose File” buttons on the page. Click the
button to upload a photo. Select the desired photos and click “Open”. Select
photos of your choice and click “Upload”. As done in the above step, here you
can add captions as well as tag your friends.


0 comments:
Post a Comment